Painting the exterior of a house can give the house a completely different look.
A nice coat of paint doesn’t only update the style of your home but can also make it look a lot newer and cleaner.
With this in mind, an exterior paint job can be an excellent way to increase the value and curb appeal of your house.
However, if you decide to do this job on your own, there will be certain steps you need to follow to ensure that the job is done well.
In this post, we will give you an overview of the steps to correctly paint the exterior of a house.
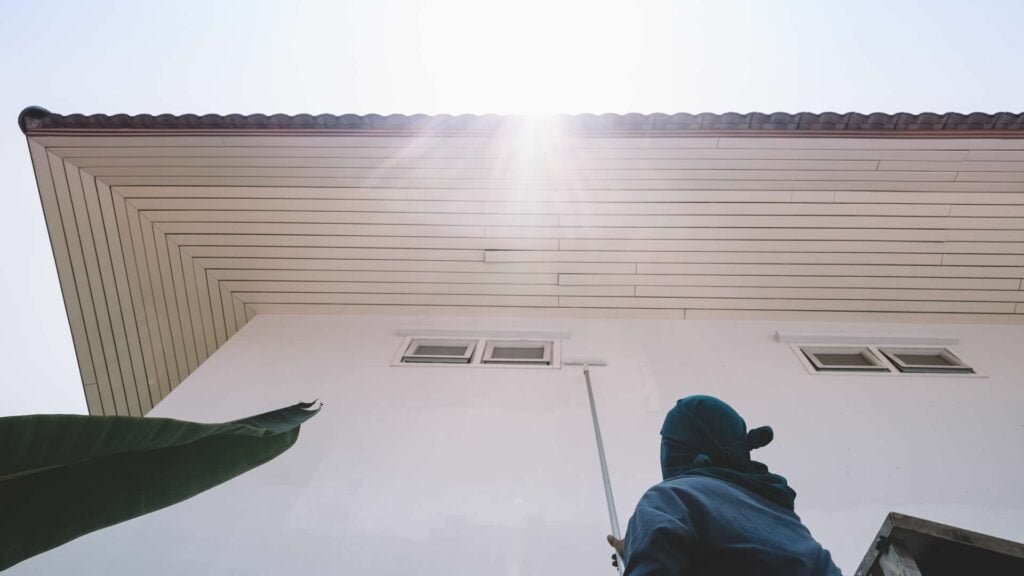
Pressure Wash the Walls
 Before painting the outside of a house, you’re going to want to make sure that the surface you’re painting is as clean as possible.
Dirt and dust build-up can significantly affect the quality of your paint job, which is why it will need to be removed before applying the first coat of paint.
To pressure wash the exterior of a house effectively, you should start at the bottom and work your way up.
Try to spray the house in a smooth and controlled way overlapping each stroke about eight inches over the prior stoke.
Once the entire exterior has been pressure washed, you can then move on to the next step.
Repair Any Damaged Surfaces
After you’ve pressure washed the exterior, the next step is to walk around the perimeter of the house to observe any damaged surfaces.
This can include any damaged wood, siding, metal, masonry, or stucco.
Once you’ve taken note of any cracks, gaps, or other imperfections, you should then apply an adhesive like an epoxy filler to these spots using a putty knife.
Once the cracks have been filled, it is recommended to sand these areas down to make them even smoother.
Remove Any Loose or Chipped Paint
After the exterior has dried and all damaged surfaces have been repaired, the next step is to do another inspection of the exterior to check for any loose or chipped paint.
Place a cloth or plastic cover on the ground to collect any loose paint.
Remove the loose or chipped paint with a paint scraper and sand the surface after it has been removed.
Use Caulk to Fill in any Other Gaps Around the Trim
If you have any gaps between the house and trim around the doors and windows, you will want to use an exterior caulk and caulk gun to fill those gaps.
Houses with multiple materials like siding and brick can be more susceptible to gaps.
Add some caulk to the surfaces where the different construction materials meet to smoothen the surface.
Prime Any Stains on the Exterior
After you’ve completed the prior steps for prepping your exterior, the next thing you’re going to want to do is prime any visible stains.
Inspect the exterior for stains and wood knots and apply one coat of stain-blocking primer to the area with a paintbrush.
 Protect Doors, Windows, and Lights
Once you’ve properly prepared the exterior surface of the house, the next step is to protect all doors, windows, and lights located on the exterior of the house.
You can use plastic sheeting and painter’s tape to do this.
Once you’ve properly installed adequate protection, you can finally begin the painting process.
Paint the Exterior of the House
Now that you’ve thoroughly prepared the exterior, you can now finally start painting.
To begin, start by loading flat or eggshell exterior paint into the paint sprayer.
Depending on the brightness of the hue, you can either apply one or two coats of flat or eggshell exterior paint to the exterior of the house.
Make sure to paint from top to bottom using smooth and steady strokes overlapping each movement by at least eight inches.
If you’re changing your exterior color from light to dark color or vice versa, you should apply a coat of primer before repainting the house.
If you’re painting it the same color, a primer will not be necessary.
Paint the Exterior Trim and Doors
After you’ve completed the entire exterior of the house, you can then proceed to remove the protective plastic and tape from the door and windows.
Once removed, we recommend adding two coats of exterior semigloss paint to the trim and doors using a regular paintbrush. Once finished, let the paint dry and check back to see the final result.
By following all of the steps laid out before this one, you will be surprised at how nice your paint job will turn out.
Summary
Now that we’ve listed the necessary steps to take to prepare your house for an exterior coat of paint, as well as the painting process itself, it has become clear that painting the exterior of a house is a pretty straightforward process.
While it might seem intimidating if you’ve never done it before, the truth is that it is not that difficult of a job.

By preparing the exterior properly, through power washing, removing any chipped paint, and caulking any big gaps or cracks, you can ensure that your surface is smooth and ready for a fresh coat of paint.
Preparation is key when painting the exterior of a house.
If you’re considering doing it on your own, simply follow the steps outlined in this post, and you will be impressed by the result of your paint job. If you don’t have the time to do this on your own, you can always count on us to get the job done for you.
Whether you decide to hire outside help or take on this project by yourself, you can be sure that following these steps will ensure that your exterior paint job is done correctly.
If you need some help, call us! At BEST PRO BUILDERS we offer a full range of professional construction services and solutions to fit virtually any need or budget. From full design/build services to installing that backyard patio and outdoor kitchen you’ve been dreaming of, you can trust our team to deliver.
No matter if you need construction, remodeling or some other home services, count on us to make your house a beautiful and real safe home!